A seismic viewing utility is available from within the SFE application. It is accessed by pressing the  button on the toolbar. This allows both the original seismic and the result of SFE processing to be viewed. The enhanced section is updated in real time as SFE processing is running. This allows the you to assess the results of SFE processing and alter parameters if required.
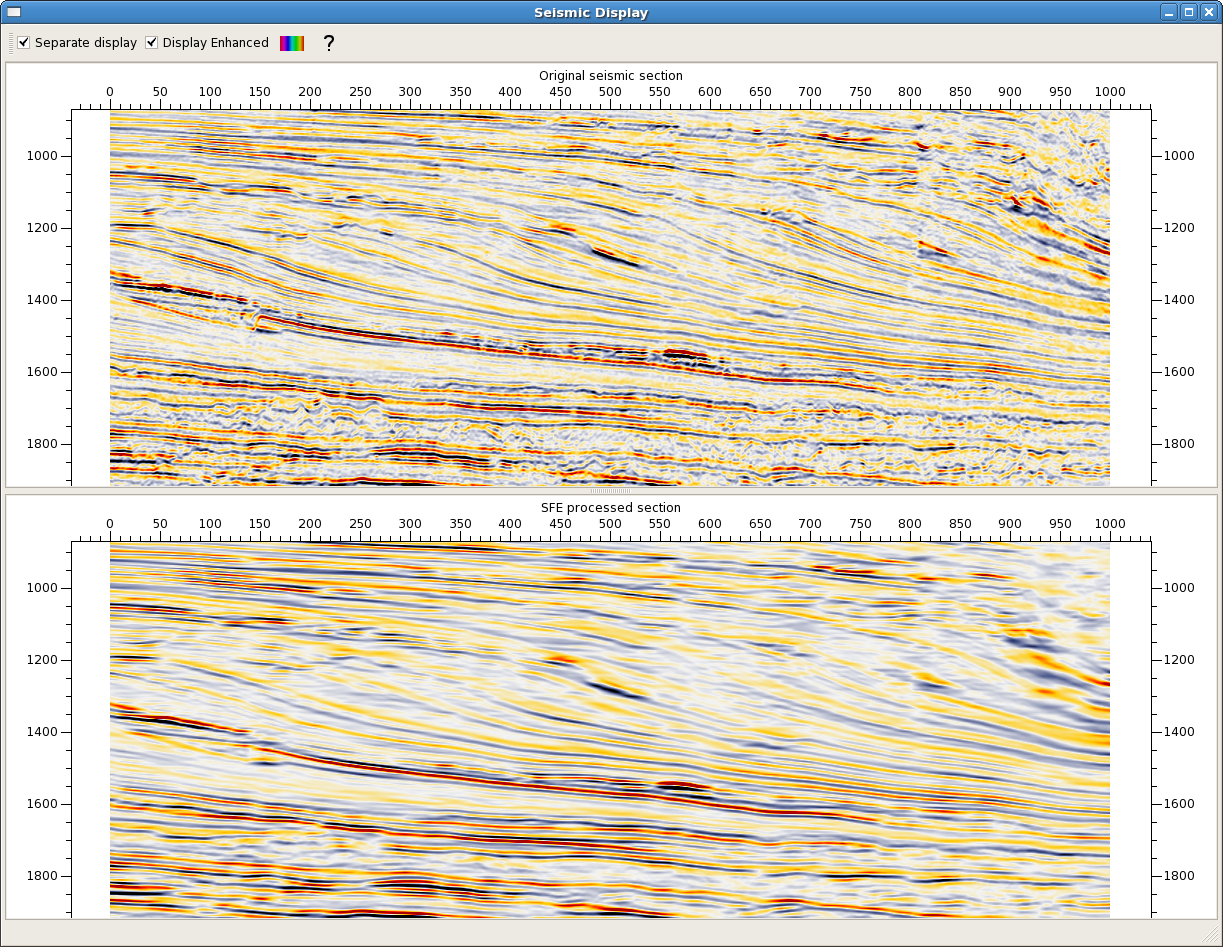
The Seismic View window is subdivided into 2 panels. The top panel displays the input volume and the bottom section displays the output of SFE processing. After you have selected the input volume and a polygon specifying the traverse in the Select Data dialog and closed this dialog, the Seismic viewer will display the input volume along the selected traverse in both top and bottom panels. This is normal. When you start the SFE processing (either in Preview mode or Output mode) the bottom section will start being replaced by the result of the SFE processing and will continue until the SFE processing finishes. The bottom display will contain the entire SFE section as shown on the figure above.
The top section of the seismic viewing window shows a toolbar which allows you to control seismic display.
| Separate display | Toggling this checkbox allows you to switch on and off the top panel that contains the original seismic section. When this toggle is off, the Seismic View window will only contain the panel that displays SFE seismic section. By default this option is switched on. |
| Display enhanced | Toggling this checkbox controls what is displayed in the bottom panel. If this toggle is switched on it displays the SFE seismic section and if it is off it displays the original seismic. By toggling it on and off the user can compare the result of processing with the original section on the same display. By default this option is switched on. |
| This starts a tool that allows the colour palette seismic data to be changed. | |
 | Displays this help page. |
Within an individual seismic panel a number of operations are available to change the extent of displayed data:
| Desired action | Description |
| Scaling: | Click on a panel to select then, with the 'Control' key pressed, rotate the mouse wheel to zoom in/out on the selected seismic data. The data will zoom in/out around the current cursor location. |
| Horizontal scaling: | With the 'Control' and 'Alt' keys pressed, rotate the mouse wheel to zoom in/out on the selected seismic data in the horizontal direction. |
| Vertical scaling: | With the 'Control' and 'Shift' keys pressed, rotate the mouse wheel to zoom in/out on the selected seismic data in the vertical direction. |
| Moving data: | When the cursor is positioned over a seismic panel, press mouse button one. The cursor will change to a hand shape allowing data to be grabbed and moved. |
| Vertical scrolling: | When data in a seismic panel is zoomed in the data can be scrolled vertically using the mouse wheel. |
| Horizontal scrolling: | When data in a seismic panel is zoomed in the data can be scrolled horizontally. This is achieved by pressing the 'Alt' key and rotating the mouse wheel. |